The GIMP gets a significant creative boost with the integration of Stable Diffusion, a powerful text-to-image diffusion model. This collaboration opens up a new era of artistic possibilities, allowing GIMP users to harness the power of AI for image generation, inpainting, and object removal or image expansion.
Stable Diffusion in GIMP allows users to craft amazing images simply by describing them in words. Or seamlessly stitch together a panoramic shot, extending its boundaries with AI-powered detail. Stable Diffusion makes these artistic feats possible within GIMP.
- Generate original images: Enter a text prompt, and Stable Diffusion creates, generating unique visuals based on your description. Whether it’s a “vibrant underwater city” or a “retrofuturistic robot in a neon alley,” the possibilities are limitless.
- Inpaint missing areas: Repair damaged photos, remove unwanted objects, or even expand image borders by letting Stable Diffusion seamlessly fill in the missing parts. Imagine removing a distracting power line from a scenic shot or extending a portrait beyond its cropped frame. Stable Diffusion Inpainting makes this possible.
- Tweak and refine: Stable Diffusion isn’t just a one-shot tool. With iterative refinement, users can gradually guide the AI towards their desired outcome, adjusting details, tweaking colors, and adding artistic flourishes until the creation comes alive.
Popular Plugins Integrating GIMP and Stable Diffusion
This repository includes two different GIMP plugins, which can be used for generating images with stable-diffusion: One uses Stablehorde as the backend. Stablehorde is a cluster of stable-diffusion servers run by volunteers. The other plug-in uses a stable-diffusion server you run on your own computer. A GPU is needed.
How To Use
After copying the plug-in files to the correct directory, a new menu item will typically appear. For the GIMP Stable Diffusion plug-in, the menu
GimpFusion is added. From the main menu click on
GimpFusion > Config > Global.
Enter the URL to the instance of Stable Diffusion you are using. If you have installed Stable Diffusion locally, the default IP Address is typically:
http://127.0.0.1:7860
If you have multiple checkpoint models installed, or the host you are using has multiple checkpoint models installed, you can select the model you want to use by clicking on
GimpFusion > Config > Change Model. Select the model from the Model drop down.
Usage Guide: text2img
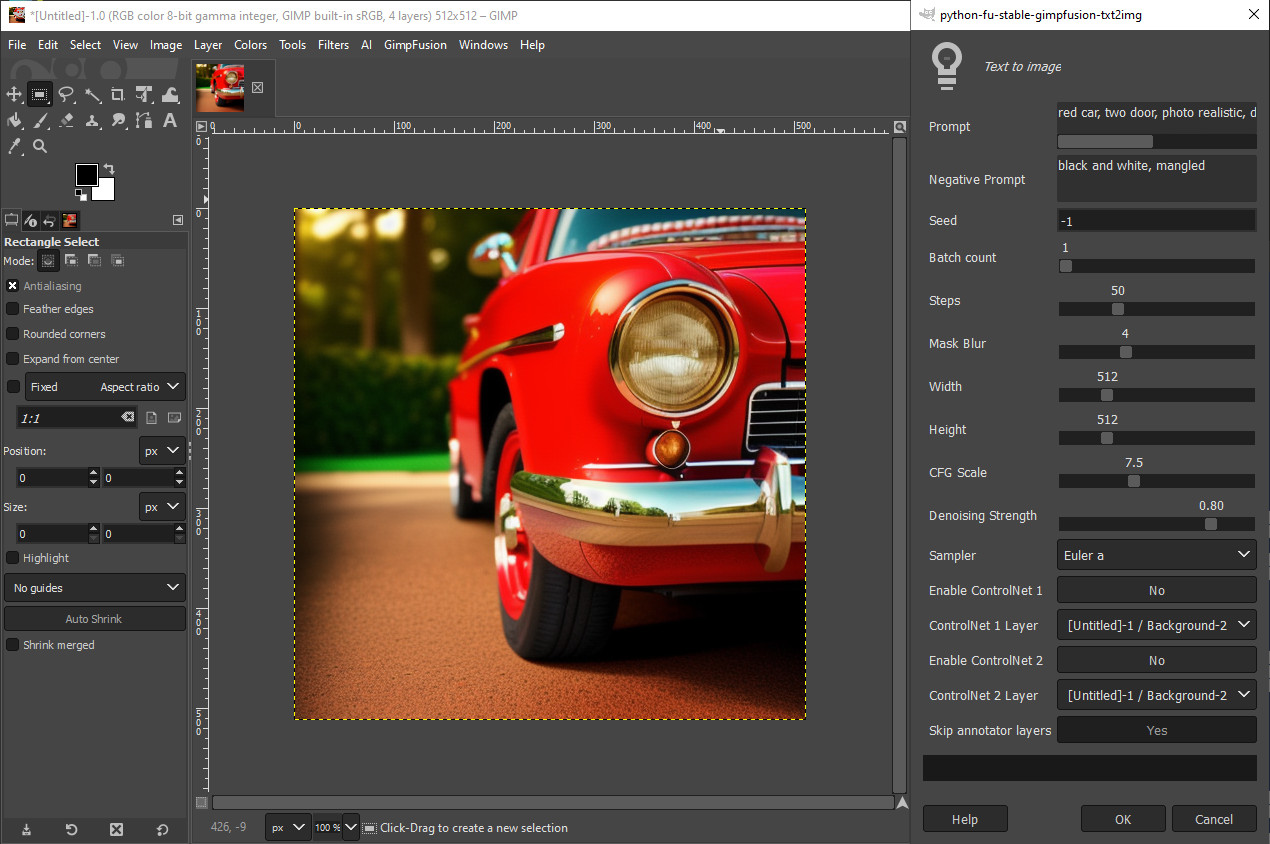
This is pretty straight forward, but you will need to play around with settings like “Prompt” and “Negative Prompt” to get an understanding of how to generate the images you like. There are numerous guides on the Internet for how to use Prompt and Negative prompt. Create a new 512px x 512px image in GIMP. Select the
text2img option from the menu. In GIMP Stable Diffusion this is labeled:
Text to image.
text2img example:
Usage Guide: img2img
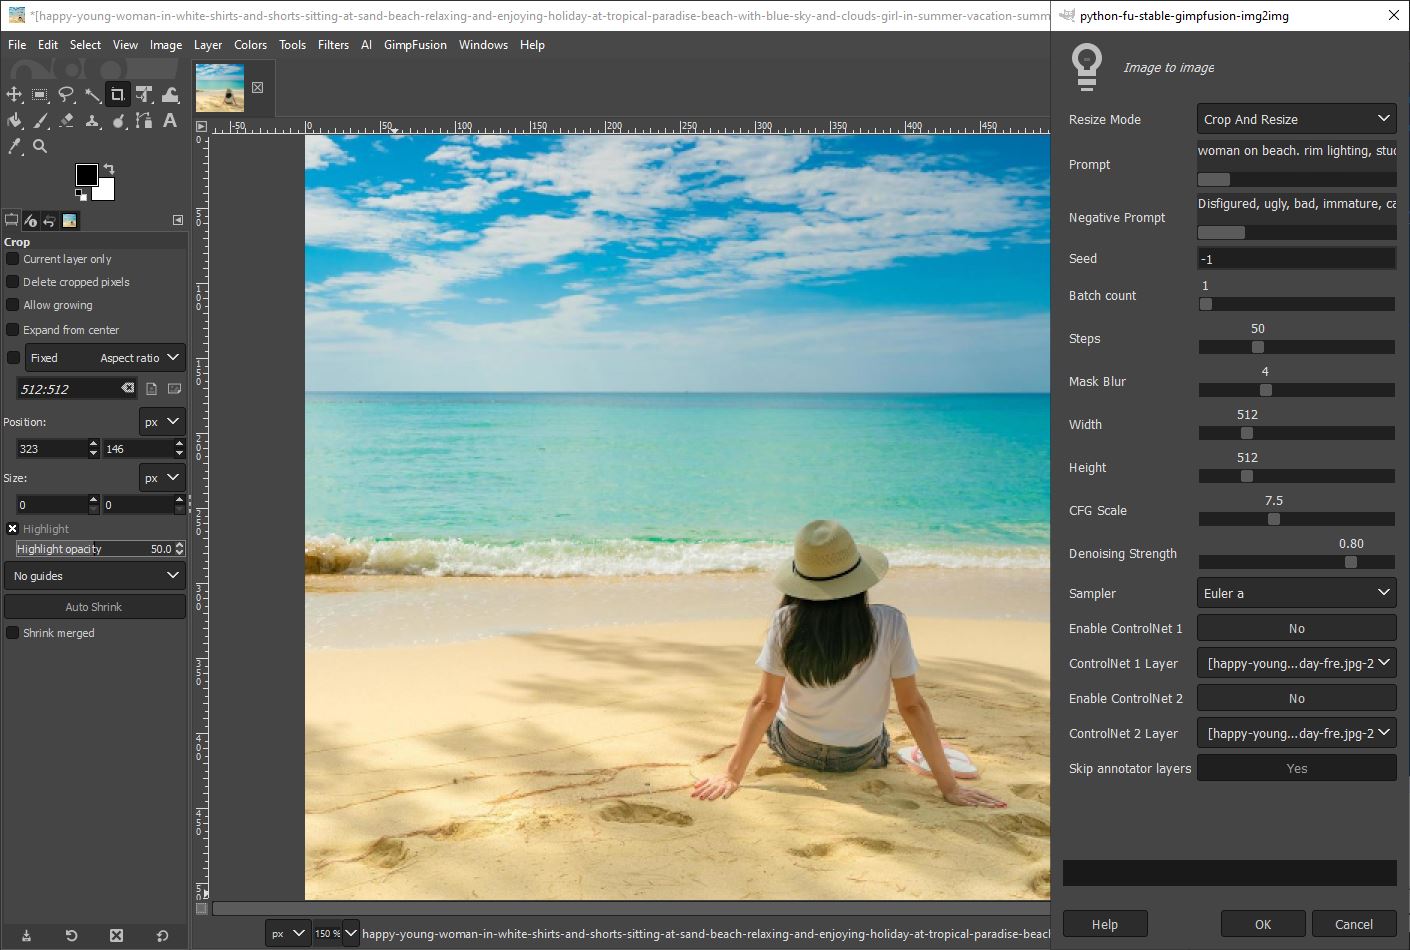
Image-to-image (img2img for short) is a method to generate new AI images from an input image and text prompt. The output image will follow the color and composition of the input image.
The input image is just a guide. It does not need to be pretty or have any details. The important part is the color and the composition.
Denoising Strength is an important setting. A lower value results in an image that more closely matches the source image. A high value will not match the source image as closely.
img2img Source Example:
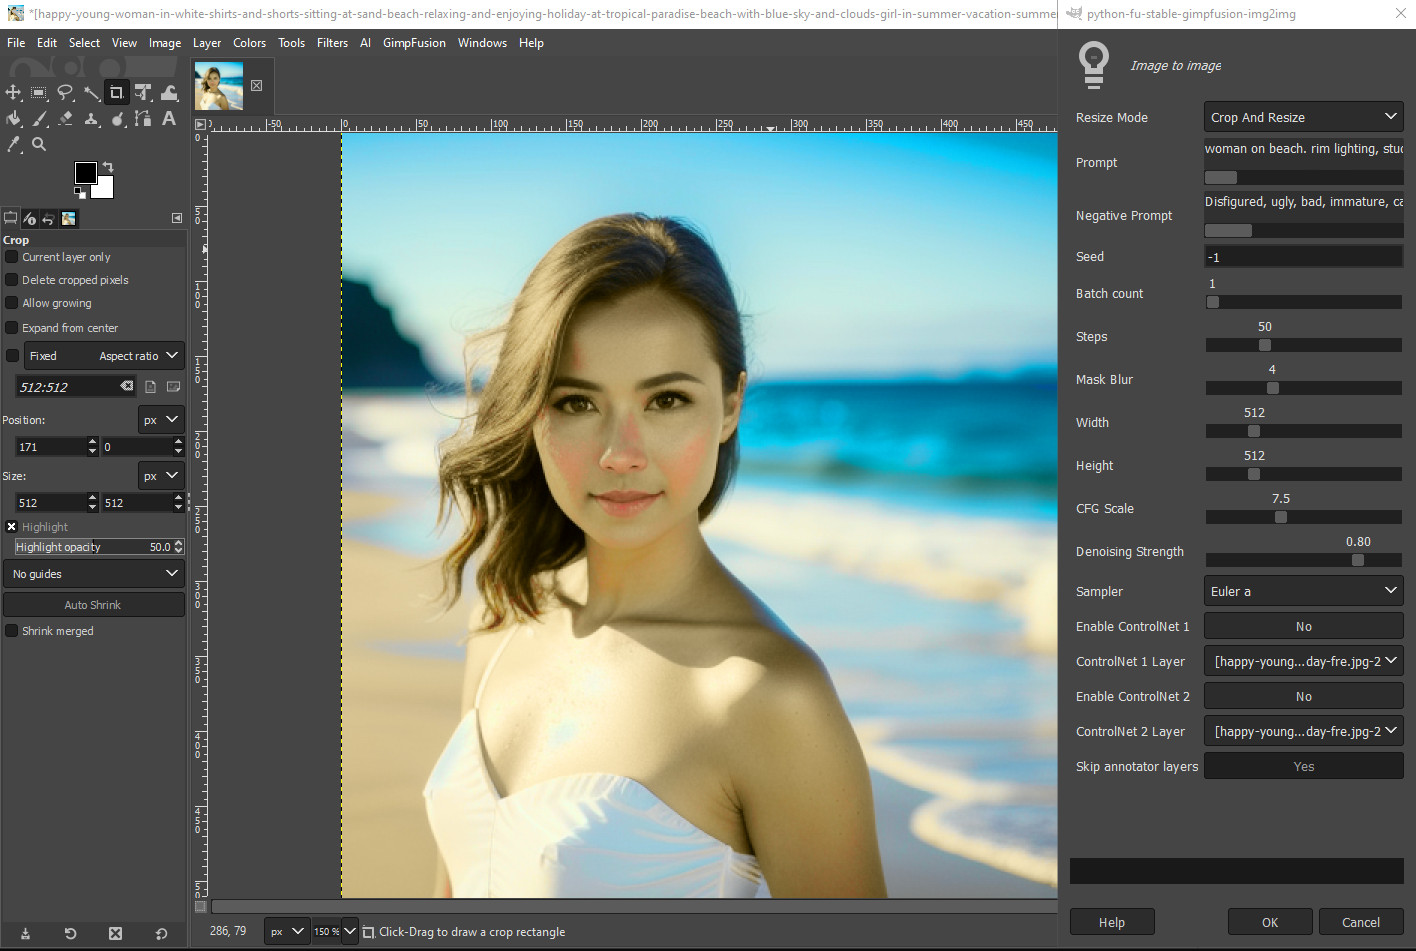
img2img Results Example – Denoising set to 45:
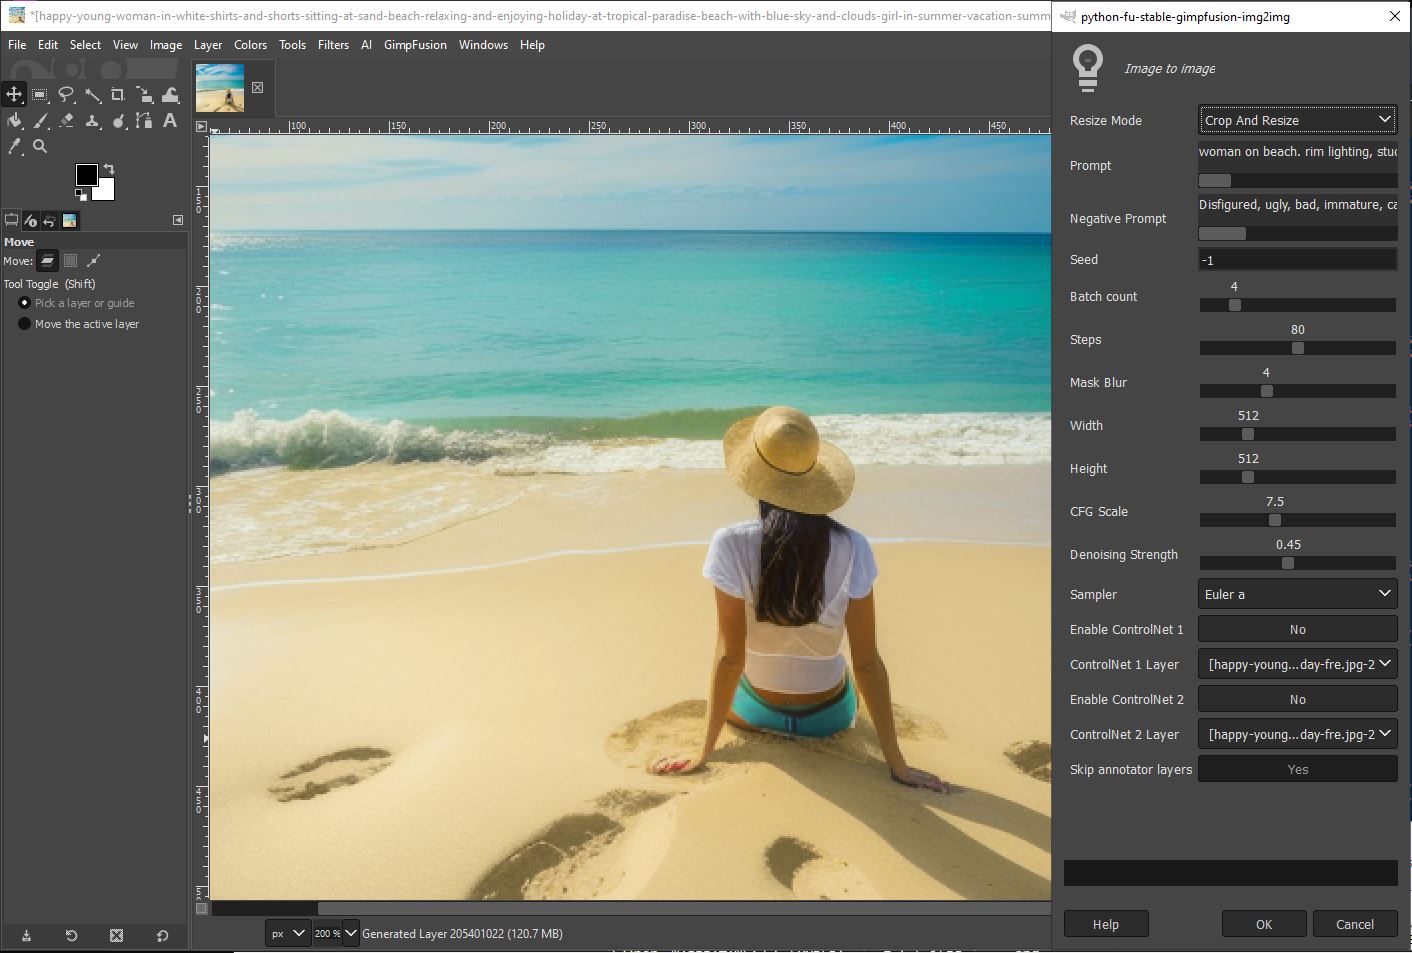
img2img Results Example – Denoising set to 80:
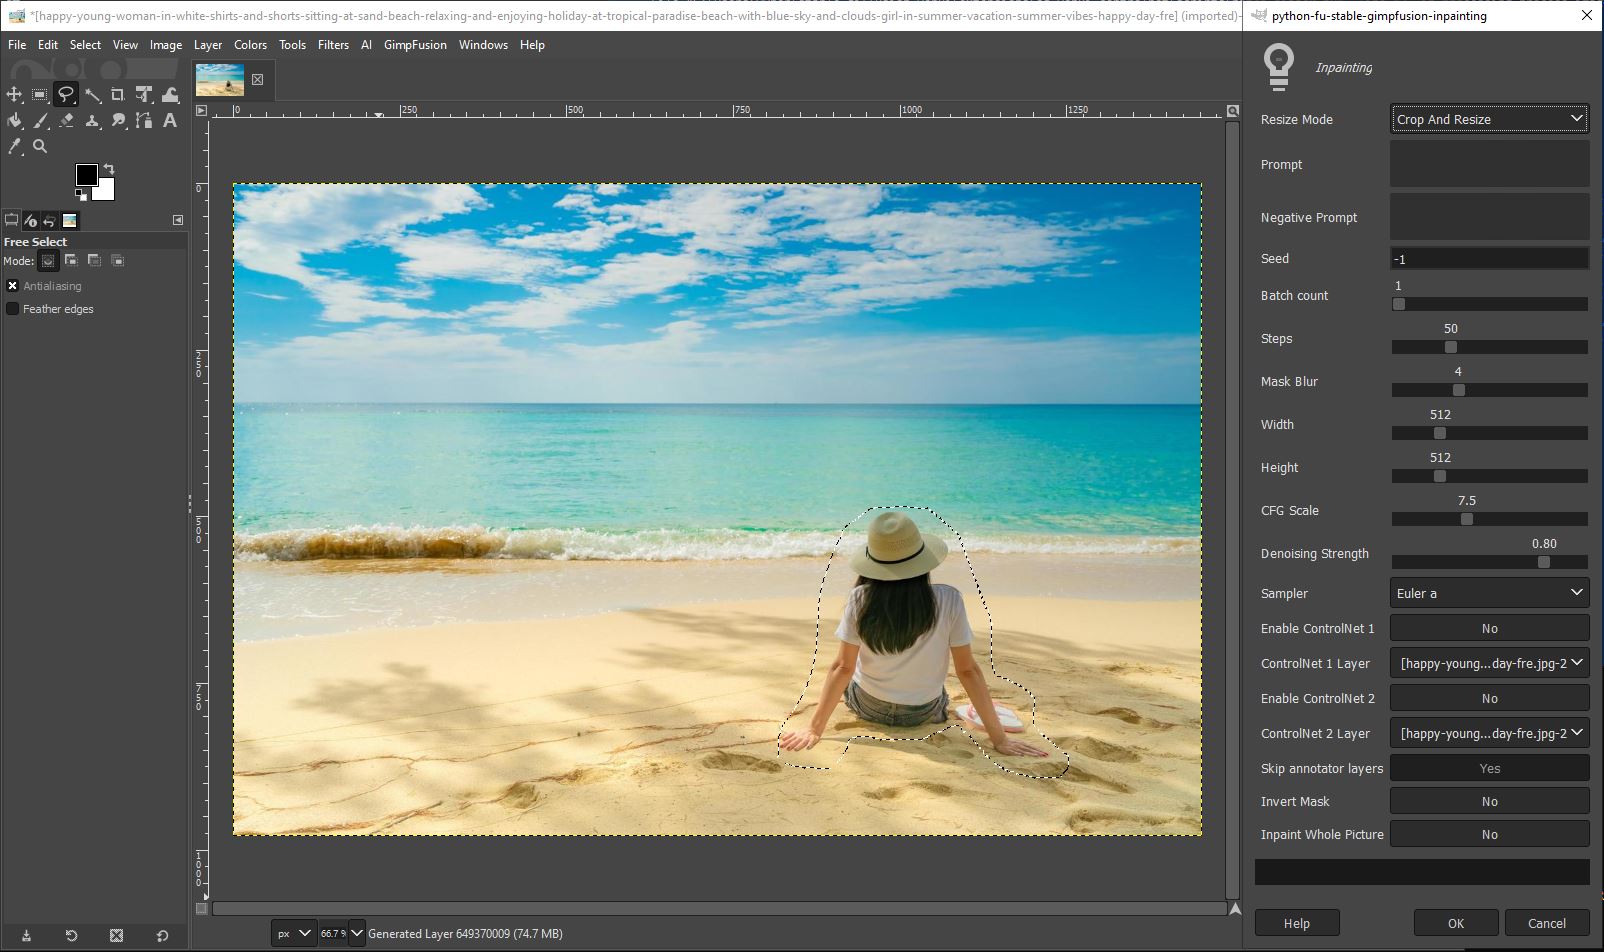
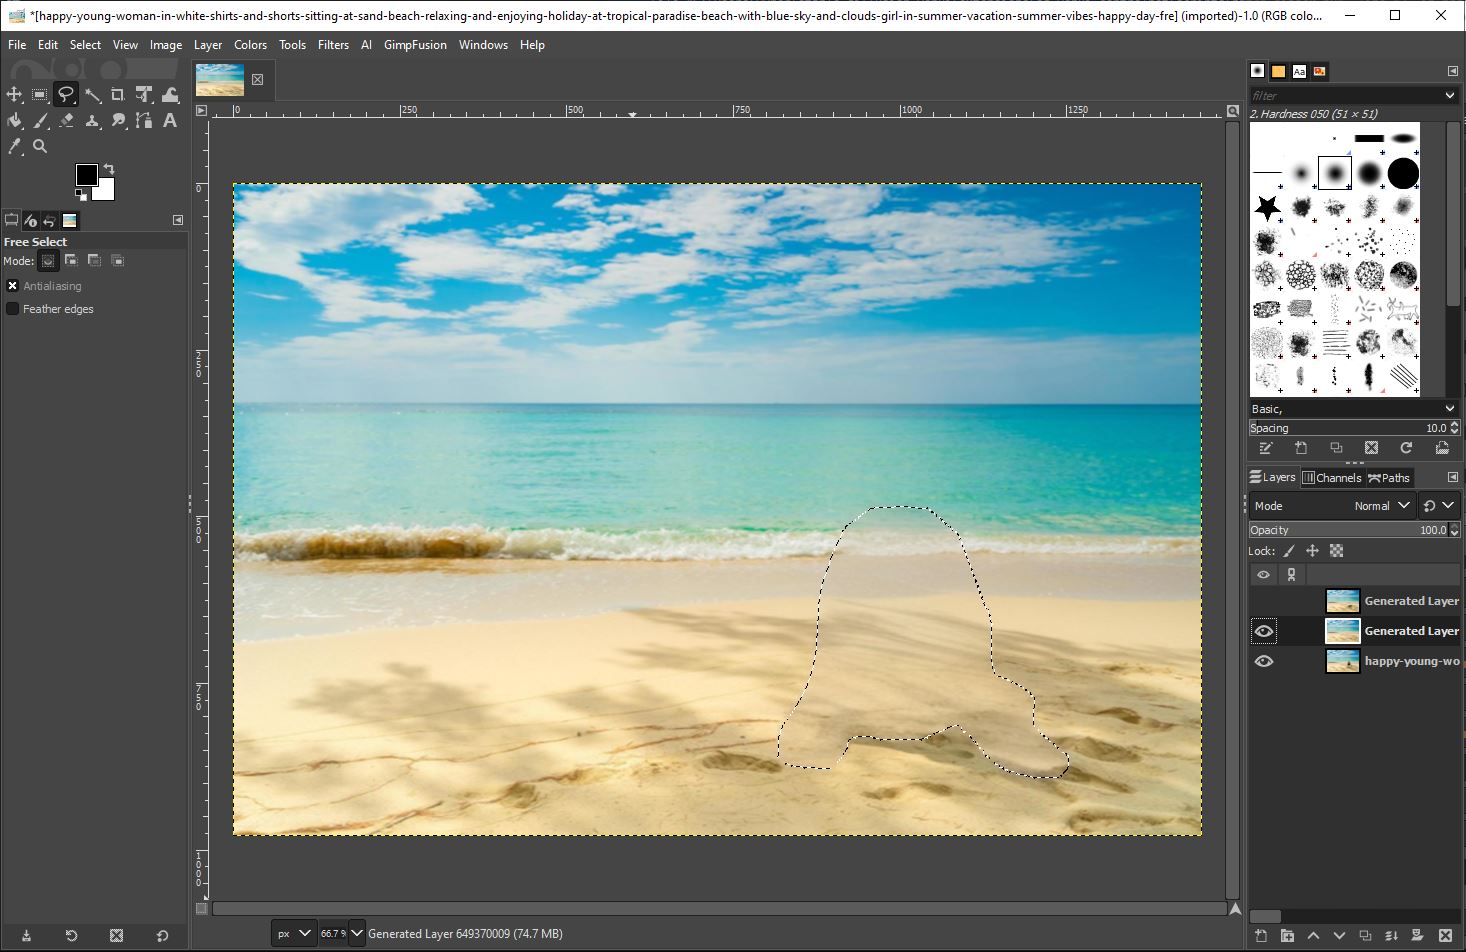
Usage Guide: img2img Inpaint – Remove Object
A popular usage for img2img Inpaint is to remove an object from an image. To accomplish this, open the image you wish to remove the object from. Use the
GIMP Free Select Tool to draw a selection around the object. Next, Select
GimpFusion > Inpainting.
img2img Inpaint Remove Object Example:
img2img Inpaint Remove Object Result:
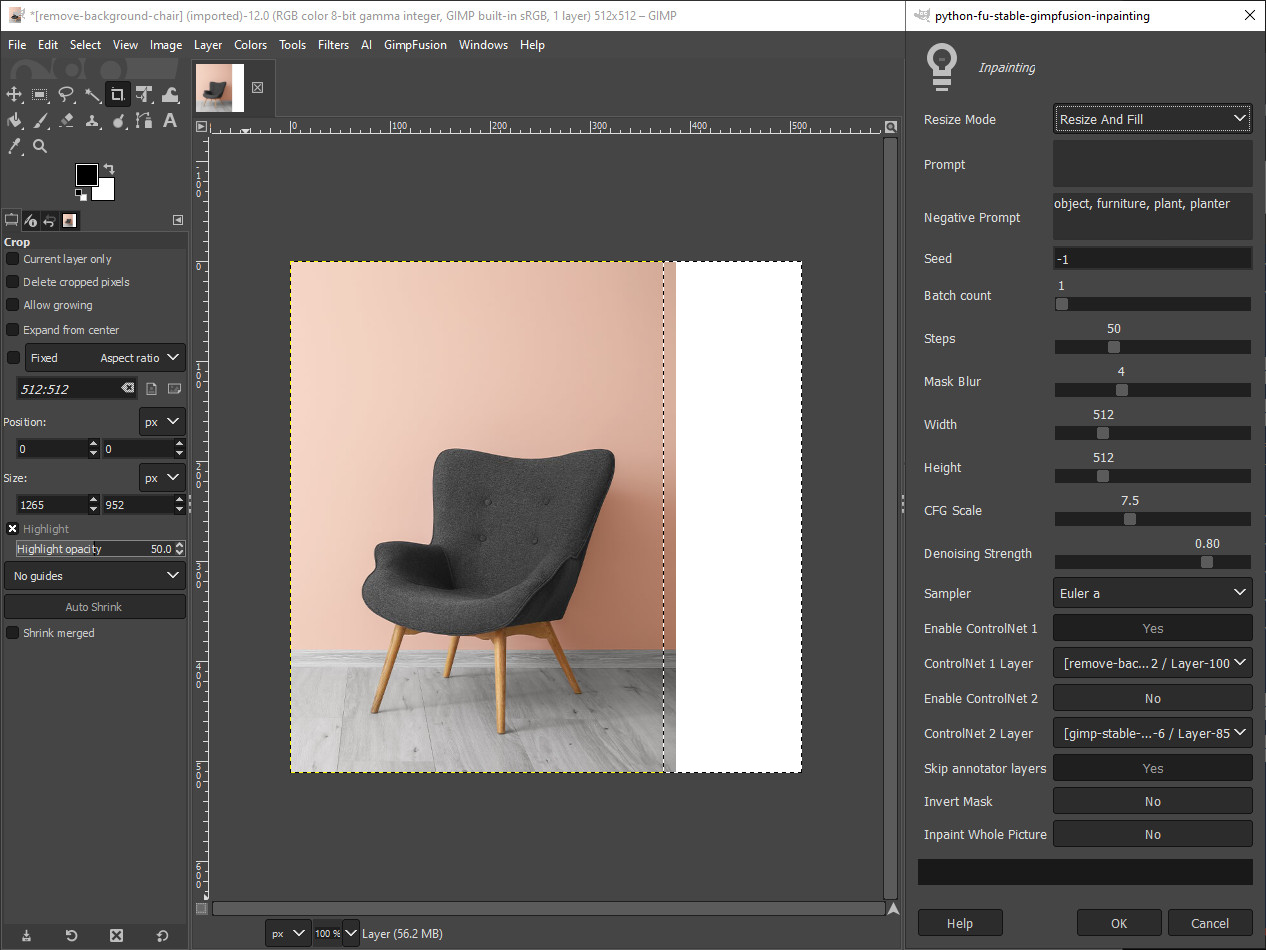
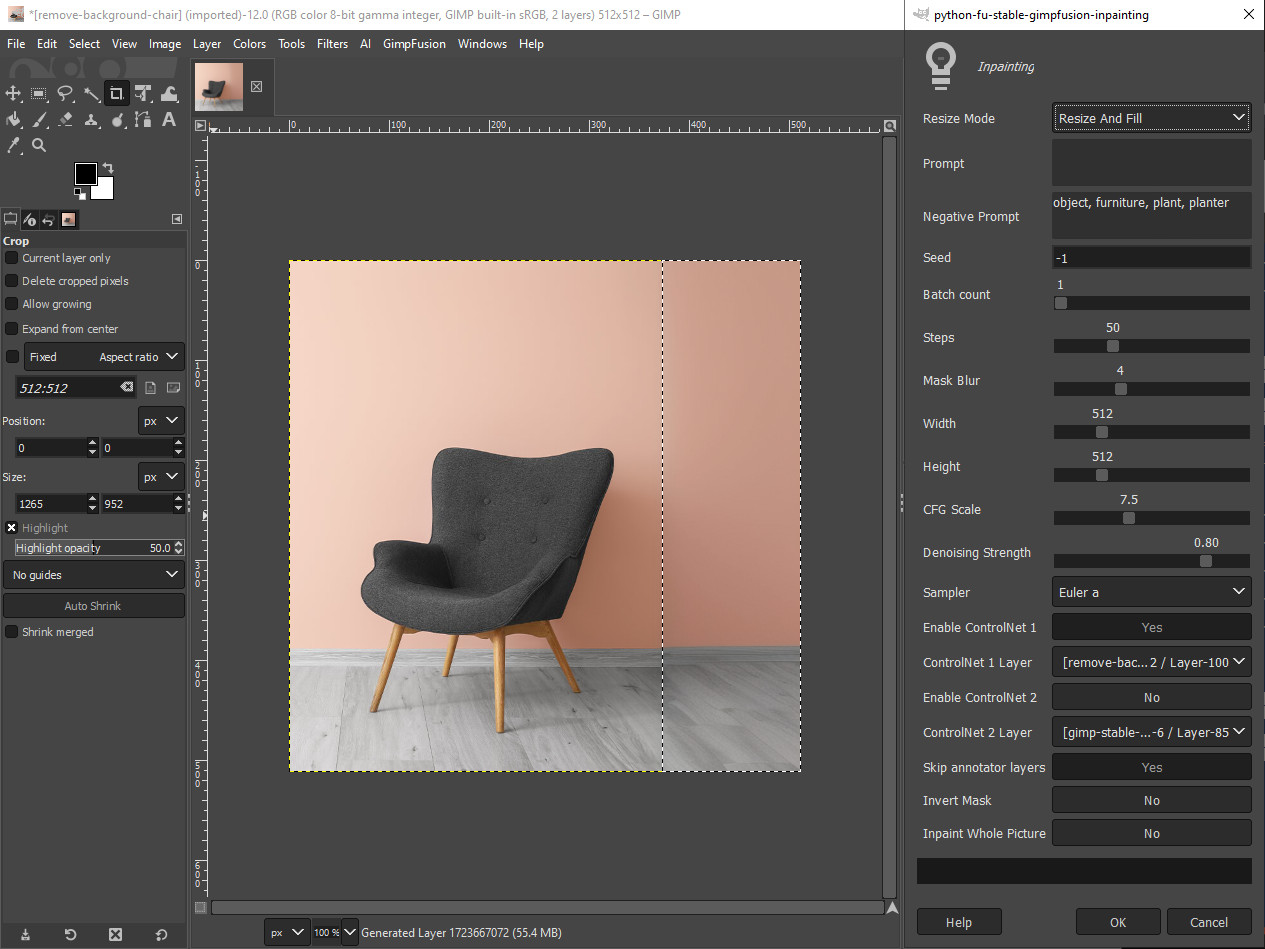
Usage Guide: img2img Inpaint – Expand Image
Another popular usage for img2img Inpaint is to expand an image. It is best to expand an image in one dimension at a time rather than trying to expand both the height and the width at the same time. To use GIMP Stable Diffusion to expand the size of an image expand the Canvas Size for the image to the new desired dimension.
Note, both the current width and height and the new expanded width and height should be divisible by 8. Example: 512px by 512px, 640px by 512px, etc. Next use the
GIMP Rectangle Select Tool to draw a selection around the area you want Stable Diffusion to inpaint. Fill that area with either a solid white color, or black (see example image). Next, Select
GimpFusion > Inpainting. Reference the example image for some guidance on field values. Also, if you do not want Stable Diffusion to add an object to the image use the Negative Prompt field to specify what you don’t want. Example: “object, furniture, plant, planter, etc.”.
img2img Inpaint Expand Image Example:
img2img Inpaint Expand Image Result:
Tips For Power Users
Stable Diffusion uses
512px by 512px images by default. This is due to several reasons:
- Training Data: The model was primarily trained on a dataset of images that were 512px by 512px in size. This means it’s most adept at generating and manipulating images within this resolution range.
- Computational Efficiency: Generating larger images requires significantly more processing power and time. The 512px by 512px default strikes a balance between quality and efficiency, making it accessible to a broader range of users and hardware setups.
- Memory Management: Using smaller images helps to reduce memory usage, which is crucial for running Stable Diffusion smoothly, especially on machines with limited resources.
While 512px by 512px is the default, Stable Diffusion does offer the flexibility to generate images at different resolutions. However, the model generally produces its most consistent and high-quality results at the default resolution.
IMPORTANT: width and height should be divisible by 8. Example: 512px by 512px, 640px by 512px, etc.
If you want to increase the size of the generated image, use
Upscayl free and open-source AI-powered image upscaling software.
If you want to remove the background of an image, use the
Open Creative Cloud Express Tools Remove Background Tool.